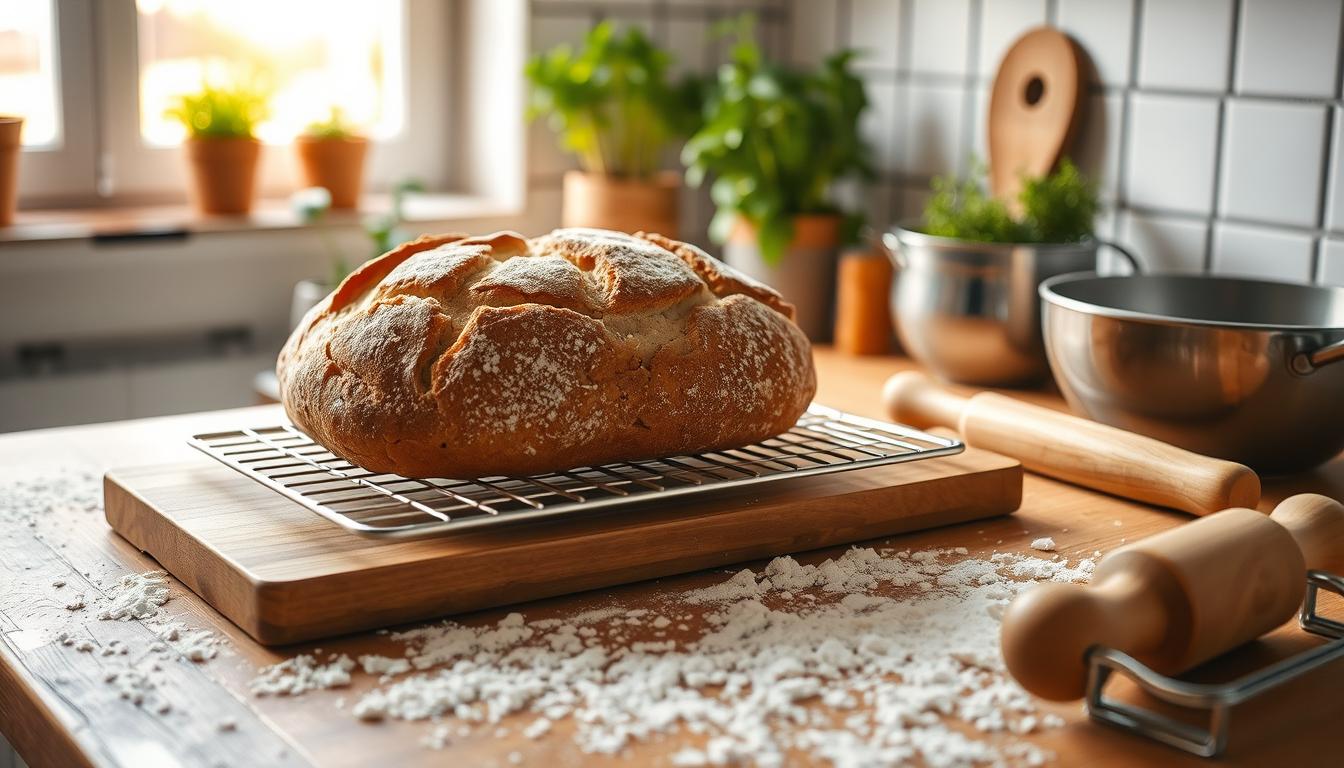
Baking bread at home transforms your kitchen into a welcoming space filled with warm, comforting aromas. Yeast breads are easier to create than you might imagine, requiring four simple ingredients: flour, water, yeast, and salt. Rising recipes offer an accessible way to craft delicious homemade bread with minimal effort.
Bread baking is more than a cooking technique—it’s an art form that connects you with generations of home cooks. Whether you’re a beginner or an experienced baker, mastering rising recipes can bring tremendous satisfaction and delectable results right to your table.
The magic of bread-making lies in understanding how simple ingredients interact. With a few key techniques, you can create artisan-quality loaves that rival professional bakery offerings, all from the comfort of your kitchen.
Table of Contents
Understanding the Basics of Rising in Baking
Baking is a delicate science that transforms simple ingredients into delicious breads and pastries. At the heart of this magical process lies yeast, a microscopic powerhouse that brings life to your proofing dough and creates the perfect texture in yeast bread
What Is Yeast and Its Role?
Yeast is a living microorganism that plays a crucial role in bread making. This tiny organism feeds on sugars in the dough, producing carbon dioxide gas that causes bread to rise. During fermentation, yeast transforms flat dough into light, airy bread with complex flavors.
“Yeast is the magical ingredient that turns humble flour and water into a delicious, rising masterpiece.”
Different Types of Yeast
Bakers have several yeast options to choose from, each with unique characteristics:
- Active Dry Yeast: Needs to be dissolved in warm water before use
- Instant Yeast: Can be mixed directly into dry ingredients
- Fresh Yeast: Highly perishable but provides rich flavor
Common Baking Terms
| Term | Definition |
|---|---|
| Proofing | Allowing dough to rise before baking |
| Fermentation | Process where yeast converts sugars into carbon dioxide |
| Kneading | Working dough to develop gluten structure |
Understanding these basics will help you master the art of baking and create delicious, perfectly risen breads every time.
Essential Tools for Baking Successfully
Baking is an art that requires precision and the right equipment. Choosing the appropriate baking tools can transform your home baking experience from frustrating to fantastic. Whether you’re a beginner or an experienced baker, having the right kitchen arsenal makes all the difference in creating delicious bread and baked goods.
Let’s explore the must-have baking tools that will elevate your bread-making skills:
Measuring Precision Matters
- Digital food scale (measures up to 11 pounds, $50-$56)
- Measuring cups set (4 sizes: 1 cup, ½ cup, ⅓ cup, ¼ cup)
- Measuring spoons (4 components: tablespoon, teaspoon, ½ teaspoon, ¼ teaspoon)
- Liquid measuring cups (1, 2, and 4 cup sizes)
Essential Baking Equipment
Invest in quality baking tools that will help you master bread flour recipes and kneading techniques. Here are some key items:
- Wire cooling rack for even baked goods cooling
- Loaf pan (8 ½ x 4 ½ inches)
- Mixing bowls with non-slip bases
- Hand mixer or stand mixer for efficient dough preparation
- Parchment paper for easy cleanup
“The right tools can turn an average baker into a bread-making artist.” – Professional Baker’s Secret
When selecting baking tools, focus on quality and versatility. A digital scale is crucial for accurate measurements, ensuring consistent results in bread recipes. Basic baking equipment typically costs between $15 and $100, making it accessible for home bakers to build a comprehensive kitchen toolkit.
Pro Tips for Tool Selection
Remember that investing in reliable baking tools doesn’t mean breaking the bank. Look for multipurpose items that can handle various baking techniques. OXO offers comprehensive measuring sets and durable equipment to support your baking journey.
Choosing the Right Flour for Your Recipes
The perfect flour is crucial for creating delicious rising recipes and artisan loaves. Different types of flour can dramatically impact the texture, flavor, and overall success of your baking projects.
Understanding Flour Varieties
Bread flour is a baker’s secret weapon for creating exceptional yeasted breads. Its 12-14% protein content strengthens robust artisan loaves and creates chewy bread textures.
- All-purpose flour: Versatile with 10-12% protein content
- Bread flour: Ideal for yeasted bread, 12-14% protein
- Cake flour: Delicate with 7-9% protein
- Whole wheat flour: Nutrient-rich with a distinctive flavor
Gluten Content and Baking Performance
The protein content of flour directly influences gluten development. Higher-protein flours create stronger gluten networks, essential for rising recipes requiring substantial structure.
| Flour Type | Protein Content | Best Uses |
|---|---|---|
| Bread Flour | 12-14% | Artisan loaves, pizza dough |
| All-Purpose Flour | 10-12% | Cookies, muffins, general baking |
| Cake Flour | 7-9% | Delicate cakes, pastries |
“Choosing the right flour is like selecting the perfect instrument for a musician – it makes all the difference in your final performance.” – Professional Baker
Remember that flour selection can make or break your recipe when crafting your next baking project. Understanding the nuances of different flour types will help you create more consistent and delicious bread and baked goods.
The Science Behind Rising Dough
Understanding the magic of bread-making involves diving deep into the fascinating world of fermentation and dough rising. Yeast breads are a delicate balance of science and artistry, where microscopic organisms transform simple ingredients into delicious, airy loaves.
How Yeast Ferments
Yeast is a remarkable microorganism that is creating creates bread. During fermentation, yeast consumes sugars and produces carbon dioxide, creating delightful air pockets in your bread. Here’s a breakdown of the fermentation process:
- Yeast breaks down sugar through two primary processes
- Aerobic respiration produces water and carbon dioxide
- Anaerobic fermentation generates ethanol and aromatic compounds
“The magic of bread-making happens at a microscopic level, where yeast transforms simple ingredients into something extraordinary.”
Importance of Temperature and Humidity
Proofing dough requires careful attention to environmental conditions. The optimal fermentation temperature ranges between 75°F and 85°F, which creates the perfect environment for yeast activation.
| Condition | Impact on Dough |
|---|---|
| Temperature Below 75°F | Slow yeast activity, minimal rising |
| Temperature Above 85°F | Rapid fermentation, potential yeast breakdown |
Humidity plays an equally critical role in dough development. Too dry conditions can create a hard crust, while excessive moisture can lead to sticky, unmanageable dough. Maintaining a balanced environment ensures your bread rises perfectly every time.
- Monitor room temperature carefully.
- Use a proofing box for consistent results
- Allow sufficient time for proper fermentation
Step-by-Step Guide to Making Bread
Bread baking is an art that combines science and passion. Creating a perfect loaf requires understanding the delicate balance of ingredients and techniques. This guide will walk you through making delicious homemade white bread that will fill your kitchen with warmth and incredible aroma.
Simple White Bread Recipe
Mastering rising recipes starts with understanding the basic ingredients and process. Here’s a foolproof recipe for a classic white bread:
- 5-5½ cups bread flour
- 2¼ teaspoons active dry yeast
- 2 cups warm water (110°F)
- 2 tablespoons canola oil
- 2 teaspoons salt
- 1 teaspoon sugar
Kneading Techniques and Rising Process
Successful bread baking depends on proper kneading techniques and understanding dough development. Follow these steps carefully:
- Activate yeast by mixing it with warm water and sugar
- Combine ingredients and mix for 1 minute until smooth
- Knead dough for 5-8 minutes until springy
- Allow the first rise for 1 hour until bubbly
- Shape the loaf and perform the second rise for 25-30 minutes
| Baking Stage | Details |
|---|---|
| Oven Temperature | 425°F |
| Baking Time | 30-35 minutes |
| Scoring Depth | ¼ inch |
Pro Tips for Perfect Bread
To enhance your bread’s texture and flavor, consider these expert tips:
- Use steaming methods like adding water or ice cubes to the oven
- Ensure water temperature is precisely 110°F for yeast activation
- Check that the k that the internal bread temperature reaches 200°F
“Bread baking is more than a recipe—it’s a craft that improves with practice and passion.” – Artisan Baker
Remember, every loaf tells a story of patience, technique, and love.
Exploring Other Yeast-Based Baked Goods
Expanding your baking skills beyond basic bread opens up a world of delicious possibilities. Yeast breads offer versatility beyond traditional loaves, allowing you to create everything from sweet treats to savory delights.

Understanding the nuances of rising recipes can transform your home baking. Different yeast-based treats require unique proofing dough techniques that can make or break your final product.
Cinnamon Rolls: A Sweet Indulgence
Cinnamon rolls represent the perfect marriage of soft dough and sweet filling. The rising process for these delectable treats involves several key steps:
- Activate yeast in warm water between 105°F to 110°F
- Allow dough to proof for optimal texture
- Carefully roll and shape before the final rise
Proofing time significantly impacts the final texture. Consider this comparison:
| Proofing Duration | Texture Result |
|---|---|
| 0 minutes | Dense and heavy |
| 30 minutes | Slightly fluffy |
| 60 minutes | Light and perfectly risen |
Pizza Dough: Crafting the Perfect Crust
Creating exceptional pizza dough requires precision in kneading and rising. A well-prepared dough typically needs 10 minutes of kneading to develop proper gluten structure.
“The secret to great pizza isn’t just in the toppings, but in the perfectly risen crust.” – Professional Baker
Your pizza dough success depends on understanding yeast behavior. Active dry yeast needs careful activation and typically requires 5-10 minutes in warm water with a touch of sugar to become fully functional.
Remember that fresh yeast and proper temperature are crucial for achieving those light, airy textures in your homemade baked goods.
Troubleshooting Common Dough Problems
Baking yeast breads can be tricky, even for experienced home bakers. Diagnosing and resolving proofing dough issues will help you create perfect baked goods every time.
Several common challenges can arise during fermentation when working with yeast breads. Let’s explore the most frequent dough problems and their solutions.
Understanding Under-Rising Dough
Under-rising dough can be frustrating, but often cause ita few key factors often cause it:
- Inactive or old yeast
- Incorrect proofing temperature
- Insufficient rising time
“Temperature is the secret weapon in successful bread baking” – Professional Baker’s Wisdom
The ideal temperature range for rising dough is between 85°F to 95°F. When your kitchen is too cool, yeast will take twice as long to rise, potentially compromising your bread’s texture.
Solving Overly Sticky Dough Challenges
Sticky dough can result from multiple factors, including:
- Too much liquid in the recipe
- Improper flour measurement
- High humidity environment
To address sticky dough, consider these professional techniques:
- Gradually add flour during kneading
- Use a bench scraper for handling
- Allow dough to rest before final shaping
Professional bakers understand that precise ingredient ratios and proper technique are crucial for successful yeast breads.
| Dough Issue | Potential Cause | Solution |
|---|---|---|
| Slow Rising | Cool Kitchen Temperature | Warm Proofing Area |
| Sticky Texture | Excess Moisture | Adjust Flour Gradually |
| No Volume | Old or Inactive Yeast | Replace Yeast |
Remember, practice makes perfect in mastering the art of bread baking!
The Art of Kneading and Shaping
Mastering kneading techniques is crucial for creating exceptional bread-baking experiences. Whether you’re an aspiring home baker or passionate about artisan loaves, understanding how to handle dough properly can transform your bread-making skills.

Kneading develops gluten strands, which provide bread structure and enable gas trapping during fermentation. This process determines the texture and quality of your final loaf.
Techniques for Effective Kneading
Successful kneading involves several key strategies:
- Use the heel of your hand to push and stretch the dough
- Fold the dough over itself repeatedly
- Rotate the dough 90 degrees between kneading cycles
- Aim for a smooth, elastic texture
“Perfect kneading is the foundation of beautiful bread.” – Artisan Baker
Best Practices for Shaping Dough
When shaping your bread, focus on creating tension and maintaining structure. Different bread styles require unique shaping methods:
- Boule: Round shape requiring gentle folding
- Baguette: Elongated shape needing precise rolling
- Batard: Intermediate length with careful handling
Use a bench scraper to manage sticky dough and create tight exterior skin for optimal results. Remember that practice is perfect for bread baking!
Incorporating Flavors and Additions
Elevating your artisan loaves from simple to spectacular involves experimenting with exciting flavor combinations. Rising recipes become more interesting when introducing unique ingredients that transform basic bread baking into a culinary adventure.
I understand the impact of adding extra ingredients to bread dough. Is crucial. Different additions can change the bread’s texture, rise, and overall character.
Herbs and Spices for Savory Bread
Savory bread offers a world of flavor possibilities. Consider these popular herb and spice combinations:
- Rosemary and sea salt for a Mediterranean touch
- Cracked black pepper and thyme for robust flavor
- Garlic powder and dried basil for an Italian-inspired loaf
Sweet Additions: Nuts and Dried Fruits
Transform your bread baking by incorporating nuts and dried fruits that add texture and depth:
| Ingredient | Recommended Quantity | Flavor Profile |
|---|---|---|
| Chopped walnuts | 1/2 cup | Earthy, rich |
| Dried cranberries | 1/3 cup | Tart and sweet |
| Toasted almonds | 1/4 cup | Nutty and crunchy |
Pro tip: Lightly toast nuts before adding them to your dough to enhance their flavor and prevent sogginess.
Remember that adding ingredients like nuts or dried fruits can affect the hydration of your dough. You might need to adjust rising times and liquid quantities to maintain the perfect bread texture.
Experimenting with flavors makes bread baking an exciting culinary journey. Your kitchen becomes a playground for creativity, transforming simple ingredients into extraordinary artisan loaves.
Storing and Freezing Your Baked Goods
After investing time and effort in bread baking, knowing how to preserve yeast bread and rising recipes becomes crucial. Proper storage ensures that your homemade treats remain fresh and delicious for longer.
Best Practices for Freshness
Maintaining the quality of your baked goods requires strategic storage techniques. Here are key recommendations for keeping your bread at its best:
- Store freshly baked bread at room temperature for 2-3 days
- Use airtight containers to prevent moisture loss
- Keep bread away from direct sunlight and heat sources
Freezing Techniques for Bread and Pastries
Freezing is an excellent method for extending the life of your bread-baking creations. Different items require specific approaches:
| Baked Good | Freezing Duration | Thawing Method |
|---|---|---|
| Whole Bread Loaves | Up to 3 months | Overnight in refrigerator |
| Bread Slices | 1 month | Room temperature, 5 minutes |
| Pastries | 2-3 months | Gentle oven reheating |
Reheating Tips for Maximum Enjoyment
Reviving frozen bread and baked goods requires careful technique. Pro tip: Always reheat at low temperatures to prevent drying out. Wrap items in foil when using the oven to retain moisture during reheating.
Freezing bread essentially halts the staling process, making it a reliable long-term storage method for your rising recipes.
By following these storage strategies, you’ll preserve your homemade yeast bread’s delightful taste and texture, ensuring every bite remains as delicious as the moment they were baked.
The Joy of Sharing Your Rising Recipes
Bread baking is more than just creating delicious artisan loaves—it’s about building connections. Your newfound skills in rising recipes can become a powerful way to share love and warmth with friends and family. Imagine presenting a freshly baked loaf wrapped in kitchen twine and a small jar of homemade jam or locally sourced honey.
Consider hosting a bread-baking gathering to teach friends your new techniques. About 90% of families report stronger connections when cooking together, and sharing your passion for bread baking can create memorable experiences. You might also create themed gift baskets featuring homemade bread alongside complementary items like specialty butter or unique salts.
Family recipes carry deep emotional significance. Statistics show that 80% of people feel cooking traditional recipes connects them to their cultural heritage. By sharing your rising recipes, you’re not just giving food—you’re passing down a tradition. Whether gifting a warm loaf to a new neighbor or teaching a family member your favorite technique, bread baking becomes a meaningful way to forge lasting relationships.
Gift Ideas for Fellow Baking Enthusiasts
When sharing your passion for back baking, ink is created. Tivis, a handwritten recipe card, a custom bread-making apron, or a collection of unique flour types can inspire fellow baking enthusiasts. Remember, 70% of family recipes are passed down through generations, and your gifts can spark someone else’s culinary journey.