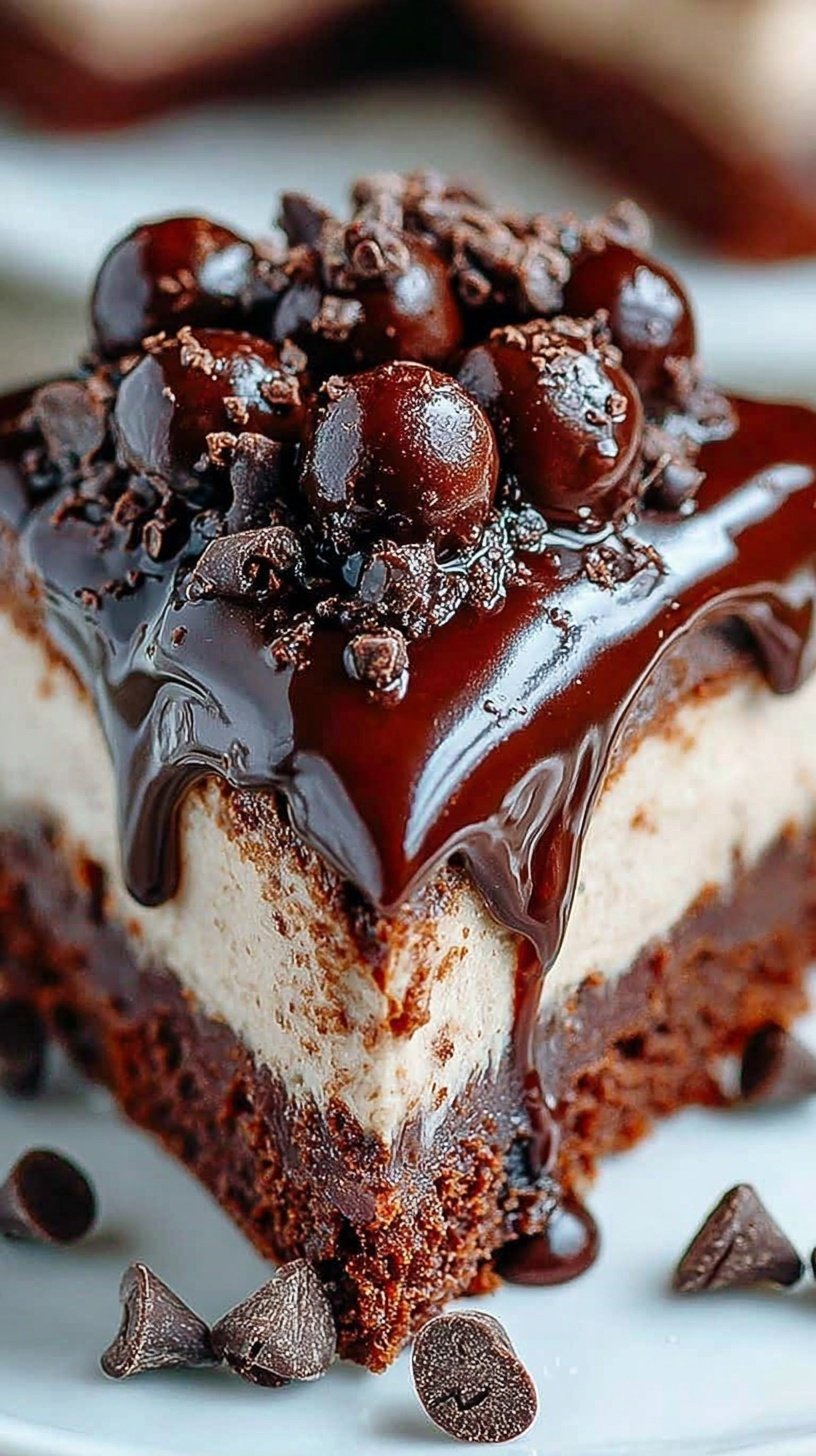
Sometimes you just need something rich and chocolatey without turning on the oven. These no-bake cheesecake brownies are the perfect solution for your next sweet craving. This recipe delivers a fudgy base and a velvety filling every time. You will love how simple it is to whip up this treat.
It is the perfect choice for hot summer days or busy weekends. Your family will enjoy every decadent, creamy layer of this dessert. Let’s get started on this easy, oven-free masterpiece together.
Why This Recipe Is a Winner
This recipe is a winner because it requires zero oven time. It is perfect for those warm months when you want to keep cool. The layers of cookie crumbs and cream cheese feel very special. Your holiday guests will think you spent hours in the kitchen.
It uses simple ingredients that you probably already have at home. The make-ahead nature of this dish takes the stress out of entertaining. You can prepare it the night before and forget about it. It is truly a beginner-friendly way to impress your favorite people.
Simple Method
Making these brownies is all about simple layering and a little patience. You start with a crunchy base that sets quickly in the fridge. The filling comes together by mixing softened cream cheese with melted chocolate. Folding in whipped cream gives it a light, airy texture. Even if you have never made cheesecake, you can do this.
Ingredients You’ll Need
These treats rely on mostly pantry staples and a few fresh items. Using high-quality chocolate chips will make the flavor really shine.
- 2 cups chocolate sandwich cookie crumbs (e.g., Oreos)
- 1/4 cup unsweetened cocoa powder
- 6 tbsp unsalted butter, melted
- 16 oz cream cheese, softened to room temperature
- 1/2 cup granulated sugar
- 1 tsp vanilla extract
- 1.5 cups semi-sweet chocolate chips, melted and slightly cooled
- 1 cup heavy whipping cream, chilled
- 1 cup store-bought brownie bites, chopped into 1/2-inch pieces
- 1/2 cup semi-sweet chocolate chips (for ganache)
- 1/4 cup heavy cream (for ganache)
Step-by-Step
- Line an 8-inch square baking pan with parchment paper, ensuring there is an overhang on two sides for easy removal.
- In a medium bowl, combine the chocolate cookie crumbs, cocoa powder, and melted butter until the mixture resembles wet sand.
- Press the crumb mixture firmly and evenly into the bottom of the prepared pan; refrigerate while preparing the filling.
- In a large mixing bowl, beat the softened cream cheese and granulated sugar together until smooth and creamy.
- Add the vanilla extract and cooled melted chocolate to the cream cheese mixture, beating until fully incorporated and uniform in color.
- In a separate chilled bowl, whip the 1 cup of heavy cream until stiff peaks form.
- Gently fold the whipped cream into the chocolate cheesecake mixture using a spatula until no white streaks remain.
- Stir in the chopped brownie bites until they are evenly distributed throughout the batter.
- Spread the cheesecake filling over the chilled crust and smooth the top with an offset spatula.
- Prepare the ganache by heating 1/4 cup heavy cream until simmering, then pouring it over 1/2 cup chocolate chips; let sit for 3 minutes before stirring until glossy.
- Drizzle the ganache over the cheesecake and garnish with extra brownie pieces if desired.
- Refrigerate for at least 4 hours, or preferably overnight, until the cheesecake is completely set before lifting from the pan and slicing.
Best Ways to Enjoy It
Slice these into small, rich squares for your next family gathering. Serve them cold directly from the refrigerator for the best texture. You can pair a slice with fresh berries for a bright contrast. These are great for packing into containers for easy weekend treats. Set the table and enjoy a sweet moment with your family.
Keep It Fresh
Store any leftover brownies in an airtight container in the fridge. They will stay perfectly fresh for up to five days. You can also freeze individual slices for a quick future snack. Wrap them tightly in plastic wrap before placing them in a bag. Thaw them in the refrigerator for one hour before you eat.
Tips for Best Results
- Don’t skip the parchment paper to ensure easy removal from the pan.
- Avoid using cold cream cheese to prevent lumps in your filling.
- Whip your heavy cream in a chilled metal bowl for faster peaks.
- Fold the whipped cream gently to keep the cheesecake light and fluffy.
- For a holiday twist, top the ganache with crushed candy canes.
- Use a hot knife to get clean, bakery-style slices every time.
- Make the base ahead of time to save even more effort.
Ways to Switch It Up
- Swap the chocolate cookies for graham crackers for a lighter base.
- Use dairy-free cream cheese and coconut cream for a vegan-friendly option.
- Add a swirl of peanut butter for a classic flavor combination.
- Stir in white chocolate chips instead of brownie bites for color.
Common Questions
Can I make this a day early?
Yes, this recipe is actually better when made a day ahead. It gives the layers plenty of time to set firmly. This makes it a perfect choice for stress-free entertaining.
What if I don’t have brownie bites?
You can use chocolate chips or chopped candy bars instead. The goal is to add a fun texture to the filling. Any soft chocolate treat will work beautifully here.
How do I know when it is set?
The cheesecake should feel firm to the touch in the center. If it still wobbles a lot, give it more time. Four hours is the minimum, but overnight is always best.
I hope these no-bake cheesecake brownies bring a little extra joy to your table. They are such a fun way to treat your favorite people without any stress. Happy no-bake “baking” to you and your family!
— Alex
Ingredients
- 2 cups chocolate sandwich cookie crumbs (e.g., Oreos)
- 1/4 cup unsweetened cocoa powder
- 6 tbsp unsalted butter, melted
- 16 oz cream cheese, softened to room temperature
- 1/2 cup granulated sugar
- 1 tsp vanilla extract
- 1.5 cups semi -sweet chocolate chips, melted and slightly cooled
- 1 cup heavy whipping cream, chilled
- 1 cup store -bought brownie bites, chopped into 1/2-inch pieces
- 1/2 cup semi -sweet chocolate chips (for ganache)
- 1/4 cup heavy cream (for ganache)
Instructions
- Line an 8-inch square baking pan with parchment paper, ensuring there is an overhang on two sides for easy removal.
- In a medium bowl, combine the chocolate cookie crumbs, cocoa powder, and melted butter until the mixture resembles wet sand.
- Press the crumb mixture firmly and evenly into the bottom of the prepared pan; refrigerate while preparing the filling.
- In a large mixing bowl, beat the softened cream cheese and granulated sugar together until smooth and creamy.
- Add the vanilla extract and cooled melted chocolate to the cream cheese mixture, beating until fully incorporated and uniform in color.
- In a separate chilled bowl, whip the 1 cup of heavy cream until stiff peaks form.
- Gently fold the whipped cream into the chocolate cheesecake mixture using a spatula until no white streaks remain.
- Stir in the chopped brownie bites until they are evenly distributed throughout the batter.
- Spread the cheesecake filling over the chilled crust and smooth the top with an offset spatula.
- Prepare the ganache by heating 1/4 cup heavy cream until simmering, then pouring it over 1/2 cup chocolate chips; let sit for 3 minutes before stirring until glossy.
- Drizzle the ganache over the cheesecake and garnish with extra brownie pieces if desired.
- Refrigerate for at least 4 hours, or preferably overnight, until the cheesecake is completely set before lifting from the pan and slicing.