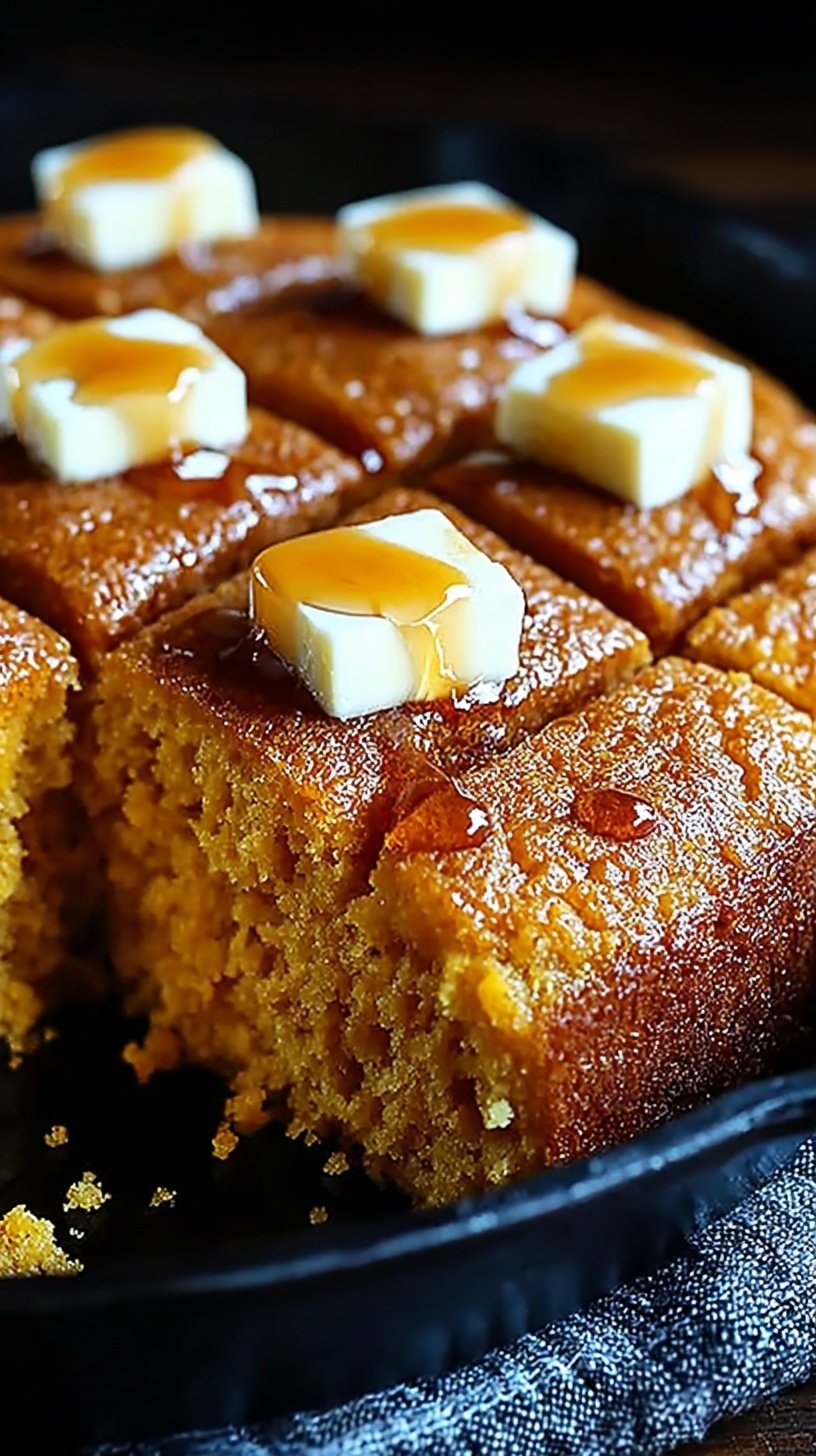
Sometimes you just need something warm and golden. This honey butter skillet cornbread is exactly that. It is the ultimate comfort food for your family. You will love the sweet, buttery finish on every slice.
Why This Honey Butter Skillet Cornbread Is a Winner
This recipe is perfect for cozy fall dinners. It pairs beautifully with a big bowl of chili. The cast iron skillet creates a perfectly crisp crust every time. Your family will enjoy the tender, moist center. It feels like a special treat but stays very simple.
Simple Method
You can make this even on a busy weeknight. Most of the magic happens right in your skillet. You simply mix the batter and pour it in. The hot butter sizzles and creates golden edges instantly. It is a foolproof way to get great results.
Ingredients You’ll Need
These are mostly simple pantry staples you likely have already.
- 1 cup yellow cornmeal
- 1 cup all-purpose flour
- 1/2 cup granulated sugar
- 1 tablespoon baking powder
- 1/2 teaspoon kosher salt
- 1 cup whole buttermilk
- 1 large egg, room temperature
- 1/4 cup unsalted butter, melted and cooled
- 1/4 cup honey
- 2 tablespoons unsalted butter, for skillet seasoning
- 2 tablespoons honey, for glaze
- 1 tablespoon unsalted butter, for glaze
Step-by-Step
- Preheat oven to 400 degrees Fahrenheit (204 degrees Celsius) with a 9-inch cast-iron skillet positioned on the center rack.
- Sift together cornmeal, flour, sugar, baking powder, and salt in a primary mixing vessel.
- In a secondary vessel, whisk the egg until homogenous, then integrate buttermilk, 1/4 cup melted butter, and 1/4 cup honey.
- Extract the preheated skillet using thermal protection; deposit 2 tablespoons of butter into the skillet and rotate until the interior surface is fully coated and the butter solids begin to brown.
- Integrate the liquid mixture into the dry ingredients, stirring only until the dry particulates are hydrated to prevent excessive gluten development.
- Transfer the batter immediately into the hot skillet, allowing the edges to set upon contact.
- Bake for 20 to 25 minutes until the internal temperature reaches approximately 200 degrees Fahrenheit or the surface is golden brown.
- Combine 1 tablespoon butter and 2 tablespoons honey in a small vessel and heat until liquefied.
- Apply the honey-butter emulsion to the surface of the cornbread immediately after extraction from the oven.
Best Ways to Enjoy It
Serve this warm right from the skillet. It looks beautiful on a holiday table. Pair it with honey-glazed ham or a hearty stew. Add an extra smear of butter for pure comfort. This is a guaranteed crowd-pleaser for any gathering.
Keep It Fresh
This honey butter skillet cornbread stays fresh for days. Wrap any leftovers tightly in foil or plastic. Store them at room temperature for two days. To reheat, use a 350°F oven for 10 minutes. This keeps the edges crisp and delicious. Avoid the microwave to prevent a soggy texture.
Tips for Best Results
- Preheat your skillet to ensure a crispy bottom crust.
- Do not skip the honey glaze for extra moisture.
- Avoid overmixing the batter to keep it tender.
- Use a room temperature egg for even mixing.
- For Thanksgiving, double the batch to feed a crowd.
- Add a pinch of flaky salt on top for flavor.
Ways to Switch It Up
- Swap buttermilk for almond milk and lemon juice.
- Add diced jalapeños for a spicy kick.
- Use maple syrup instead of honey for deep flavor.
- Stir in fresh corn kernels for extra texture.
Common Questions
Can I use a regular cake pan?
Yes, you can use a 9-inch cake pan. However, you will lose that signature crispy crust. The cast iron holds heat much better than cake pans.
Is this cornbread very sweet?
It has a pleasant, balanced sweetness from the honey. It is not as sugary as a cake. It works perfectly as a savory dinner side dish.
How do I know when it is done?
Look for golden brown edges pulling from the sides. A toothpick inserted in the center should come out clean. The top will feel firm to the touch.
I hope this cozy recipe brightens your fall evenings. Give it a try and let every sweet bite warm you up. Happy cooking!
— Alex

Ingredients
- 1 cup yellow cornmeal
- 1 cup all -purpose flour
- 1/2 cup granulated sugar
- 1 tablespoon baking powder
- 1/2 teaspoon kosher salt
- 1 cup whole buttermilk
- 1 large egg , room temperature
- 1/4 cup unsalted butter, melted and cooled
- 1/4 cup hone y
- 2 tablespoons unsalted butter, for skillet seasoning
- 2 tablespoons honey , for glaze
- 1 tablespoon unsalted butter, for glaze
Instructions
- Preheat oven to 400 degrees Fahrenheit (204 degrees Celsius) with a 9-inch cast-iron skillet positioned on the center rack.
- Sift together cornmeal, flour, sugar, baking powder, and salt in a primary mixing vessel.
- In a secondary vessel, whisk the egg until homogenous, then integrate buttermilk, 1/4 cup melted butter, and 1/4 cup honey.
- Extract the preheated skillet using thermal protection; deposit 2 tablespoons of butter into the skillet and rotate until the interior surface is fully coated and the butter solids begin to brown.
- Integrate the liquid mixture into the dry ingredients, stirring only until the dry particulates are hydrated to prevent excessive gluten development.
- Transfer the batter immediately into the hot skillet, allowing the edges to set upon contact.
- Bake for 20 to 25 minutes until the internal temperature reaches approximately 200 degrees Fahrenheit or the surface is golden brown.
- Combine 1 tablespoon butter and 2 tablespoons honey in a small vessel and heat until liquefied.
- Apply the honey-butter emulsion to the surface of the cornbread immediately after extraction from the oven.