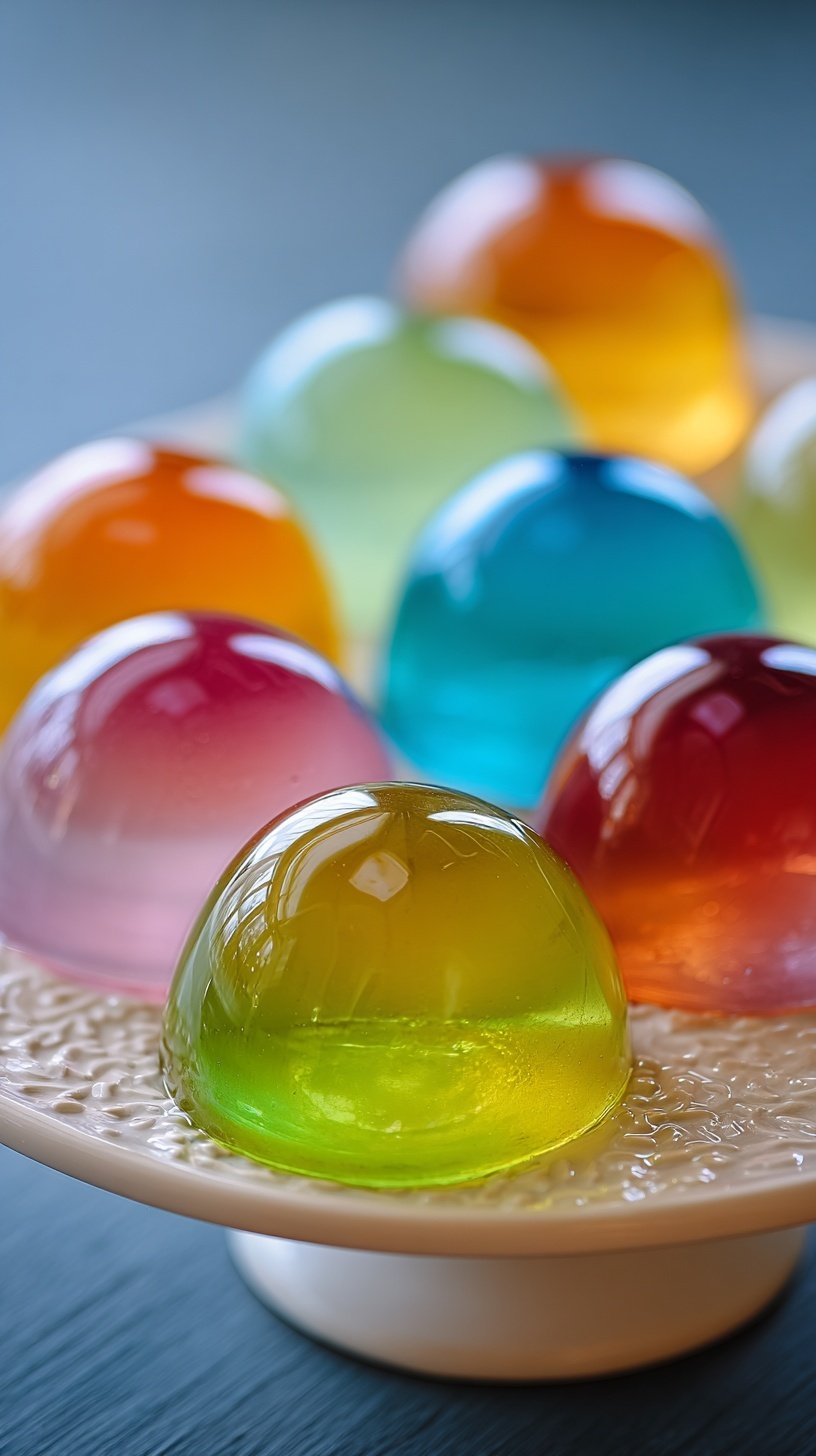
Easter brunch calls for bright, fun treats for kids. These Jello Easter Eggs are the perfect stress-free snack. They look beautiful on any spring dessert table. You can make them ahead of the holiday. Your family will love the bouncy texture and colors.
Why You’ll Love Jello Easter Eggs
You only need simple pantry staples for this recipe. You can make them days in advance. They are firm and easy to hold for toddlers. This is a great budget-friendly holiday snack. Perfect for a bright spring celebration. Kids enjoy picking their favorite colors to eat.
How It Comes Together
The process is very straightforward and simple. You just dissolve, fill, and chill. Using a syringe makes it mess-free and easy. Even beginners can master this easily. It is a fun family project to try together. You will feel like a holiday pro.
Simple Ingredients
This recipe uses mostly pantry staples you likely have. You can find these items at any store.
- 4 packages (3 oz each) flavored gelatin, assorted colors
- 3 cups boiling water
- 1 cup cold water
- Vegetable oil spray
- 12 plastic Easter egg molds (with a small hole in the top)
Step-by-Step
- Clean and dry the plastic egg molds thoroughly.
- Lightly spray the interior of each mold with vegetable oil spray to ensure easy release.
- Close the egg molds securely and place them upright in an egg carton or a stable container.
- For each flavor, dissolve 3 ounces of gelatin powder in 3/4 cup of boiling water, stirring for 2 minutes until fully dissolved.
- Stir in 1/4 cup of cold water into the gelatin mixture.
- Using a clean syringe or a small funnel, pour the liquid gelatin into the hole at the top of each egg mold until filled to the top.
- Refrigerate the molds for at least 4 hours or until the gelatin is completely firm.
- To unmold, carefully open the plastic shells and gently slide a dull knife around the edge to release the gelatin egg.
Best Ways to Enjoy It
Place them in a nest of edible grass. They look beautiful on a white platter. Serve them as a light snack after ham. Your guests will love the vibrant colors. Set the table and enjoy the holiday. Pack them into lunchboxes for a surprise.
Keep It Fresh
Store them in an airtight container. Keep them in the fridge for five days. Do not freeze these gelatin treats. Keep them chilled until serving time. They stay firm and bouncy when cold. Cover them to prevent any drying out.
Tips for Best Results
- Spray the molds lightly with oil.
- Don’t skip the thorough drying step.
- Use a small funnel for less mess.
- Make these two days before Easter.
- Use a steady egg carton for filling.
- Wipe away any spills quickly.
- Choose bright, neon gelatin colors.
- Let kids help with the filling.
Ways to Switch It Up
- Use sugar-free gelatin for a light option.
- Try clear gelatin with tiny fruit bits.
- Layer different colors for a striped look.
- Swap flavors to match your spring decor.
FAQs
Can I make these ahead?
Yes, you can make them early. They stay fresh for five days. This helps you save time on Easter.
How do I remove them easily?
Use a light coating of oil. A dull knife also helps release them. Be gentle so they stay smooth.
I hope these bright eggs bring joy to your home. Have a wonderful spring celebration with your family. Happy cooking!
— Alex

Ingredients
- 4 packages (3 oz each) flavored gelatin, assorted colors
- 3 cups boiling water
- 1 cup cold water
- Vegetable oil spray
- 12 plastic Easter egg molds (with a small hole in the top)
Instructions
- Clean and dry the plastic egg molds thoroughly.
- Lightly spray the interior of each mold with vegetable oil spray to ensure easy release.
- Close the egg molds securely and place them upright in an egg carton or a stable container.
- For each flavor, dissolve 3 ounces of gelatin powder in 3/4 cup of boiling water, stirring for 2 minutes until fully dissolved.
- Stir in 1/4 cup of cold water into the gelatin mixture.
- Using a clean syringe or a small funnel, pour the liquid gelatin into the hole at the top of each egg mold until filled to the top.
- Refrigerate the molds for at least 4 hours or until the gelatin is completely firm.
- To unmold, carefully open the plastic shells and gently slide a dull knife around the edge to release the gelatin egg.