It’s 6pm, you’re tired, and everyone’s hungry. You need a fast meal that actually tastes good. This thin sliced chicken breast is the answer for your busiest nights. It stays incredibly tender and cooks in just minutes. You won’t believe how easy it is to get dinner on the table tonight.
Why You’ll Love This Thin Sliced Chicken Breast
This chicken is perfect for busy weeknight dinners when time is short. The thin cutlets cook evenly so you never get dry edges. It’s a total lifesaver for the back-to-school season. Your family will love the golden-brown crust and juicy center. It’s simple, reliable, and uses basic pantry staples. You can have a protein-packed meal ready in under twenty minutes.
Cooking chicken can sometimes feel like a guessing game. This method removes the stress of raw centers or dry meat. You get tender, flavorful results every single time you cook. It is an ideal recipe for beginners who want to build confidence. Even picky eaters will enjoy the mild and savory flavor. It pairs beautifully with almost any side dish in your pantry.
Simple Method
You start by slicing the chicken horizontally into thin pieces. A quick pound with a mallet ensures everything cooks at the same rate. You’ll sear them in a hot pan with a little butter and oil. The high heat creates a perfectly seared exterior very quickly. It’s a foolproof way to avoid overcooked, rubbery poultry.
The secret is the combination of oil and butter. The oil handles the high heat without burning the pan. The butter adds a rich, savory flavor and helps with browning. You only need a few minutes per side for perfection. Beginners will find this method very easy to master. You will feel like a pro in your own kitchen.
Ingredients You’ll Need
Most of these items are likely in your kitchen right now. Using fresh, quality ingredients makes a big difference in the final taste. You only need a few simple seasonings to make this shine. It is a budget-friendly way to feed your whole family.
- 2 large boneless skinless chicken breasts
- 0.5 teaspoon kosher salt
- 0.25 teaspoon freshly ground black pepper
- 0.5 teaspoon garlic powder
- 1 tablespoon extra virgin olive oil
- 1 tablespoon unsalted butter
Step-by-Step
- Place chicken breasts on a stable cutting board and slice horizontally to create thin cutlets approximately 0.25 inches in thickness.
- Place cutlets between two sheets of parchment paper or plastic wrap and pound lightly with a meat mallet to ensure uniform thickness.
- Apply salt, black pepper, and garlic powder evenly to both sides of the chicken cutlets.
- Heat olive oil and butter in a heavy-bottomed skillet over medium-high heat until the butter foam subsides and the oil shimmers.
- Arrange chicken cutlets in the skillet in a single layer, ensuring they do not overlap to allow for proper browning.
- Sear the chicken for 2 to 3 minutes without moving them until a golden-brown crust forms on the bottom.
- Flip the cutlets and cook for an additional 2 minutes or until the internal temperature reaches exactly 165 degrees Fahrenheit.
- Transfer the chicken to a warm plate and rest for 3 minutes to allow juices to redistribute before serving.
Best Ways to Enjoy It
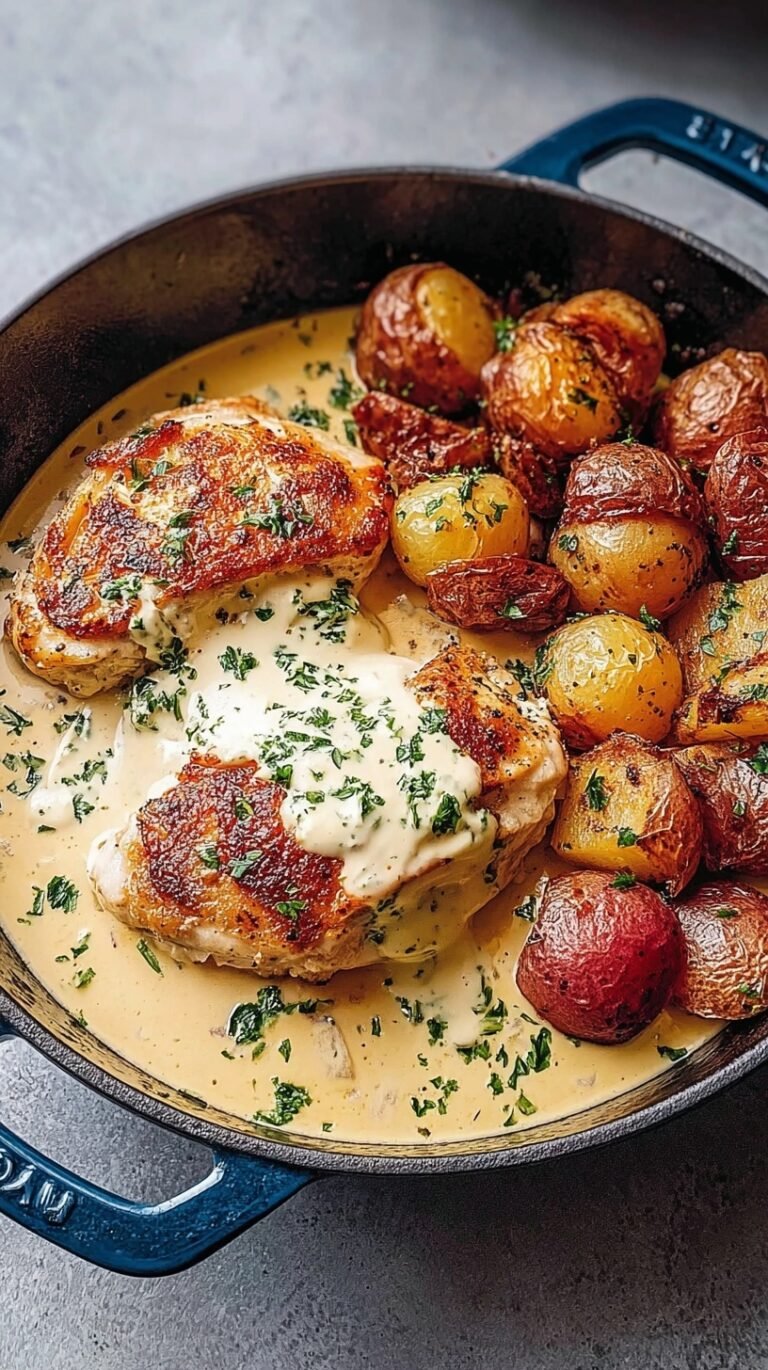
Serve these golden cutlets alongside some creamy mashed potatoes or a fresh salad. They are wonderful sliced over a big bowl of pasta. You can even tuck them into sandwiches for a quick lunch. Add a squeeze of lemon for a bright, fresh finish. This dish makes any simple side feel like a complete meal.
If you are planning a date night, serve it with asparagus. Add a glass of white wine to make it feel special. For a kid-approved meal, serve it with some simple buttered noodles. It is also great for meal prep throughout the week. You can slice it up for wraps or grain bowls. Set the table and enjoy a stress-free dinner tonight.
Storage & Reheating
Keep any extra chicken in an airtight container in the fridge. It will stay fresh for up to three days. For the best results, reheat it gently in a skillet. Use a low heat setting to keep it from drying out. You can also enjoy it cold on top of a salad. This makes it a great option for healthy lunches.
If you want to freeze it, wrap each cutlet individually. Store them in a freezer-safe bag for up to two months. Thaw the chicken in the refrigerator overnight before you reheat it. To keep the crust nice and crisp, avoid the microwave if possible. A quick warm-up in a toaster oven also works well. Always ensure the chicken is heated through before serving.
Tips for Best Results
- Don’t skip the resting time to keep the chicken juicy.
- Avoid overcrowding the pan so the chicken sears rather than steams.
- Use a heavy skillet like cast iron for the best golden crust.
- Prep the chicken in the morning to save time at dinner.
- For a fall twist, serve with roasted squash or apples.
- Upgrade the flavor by adding a pinch of smoked paprika.
- Always pat the chicken dry before seasoning for better browning.
- Use a meat thermometer to ensure a perfect 165 degree finish.
Easy Flavor Ideas
- Swap the garlic powder for Italian seasoning for a Mediterranean feel.
- Use dairy-free butter to make this recipe completely lactose-free.
- Add a dash of cayenne pepper if you like a little heat.
- Top with fresh herbs like parsley or chives before serving.
- Sprinkle with parmesan cheese in the last minute of cooking for a salty kick.
Quick Answers
Can I make it ahead?
Yes, you can slice and pound the chicken a day early. Store it in the fridge until you are ready to cook. This makes the evening process even faster.
How do I know when it’s done?
The best way is to use a meat thermometer. It should reach exactly 165 degrees Fahrenheit. The chicken will also feel firm to the touch.
Will kids eat this?
Absolutely, the mild flavor and tender texture are very kid-friendly. It is much better than store-bought nuggets. Serve it with their favorite dipping sauce.
I hope this quick chicken recipe makes your busy evenings much easier. It’s a staple in my house, and I think you’ll love it too. Happy cooking!
— Alex

Ingredients
- 2 large boneless skinless chicken breasts
- 0.5 teaspoon kosher salt
- 0.25 teaspoon freshly ground black pepper
- 0.5 teaspoon garlic powder
- 1 tablespoon extra virgin olive oil
- 1 tablespoon unsalted butter
Instructions
- Place chicken breasts on a stable cutting board and slice horizontally to create thin cutlets approximately 0.25 inches in thickness.
- Place cutlets between two sheets of parchment paper or plastic wrap and pound lightly with a meat mallet to ensure uniform thickness.
- Apply salt, black pepper, and garlic powder evenly to both sides of the chicken cutlets.
- Heat olive oil and butter in a heavy-bottomed skillet over medium-high heat until the butter foam subsides and the oil shimmers.
- Arrange chicken cutlets in the skillet in a single layer, ensuring they do not overlap to allow for proper browning.
- Sear the chicken for 2 to 3 minutes without moving them until a golden-brown crust forms on the bottom.
- Flip the cutlets and cook for an additional 2 minutes or until the internal temperature reaches exactly 165 degrees Fahrenheit.
- Transfer the chicken to a warm plate and rest for 3 minutes to allow juices to redistribute before serving.