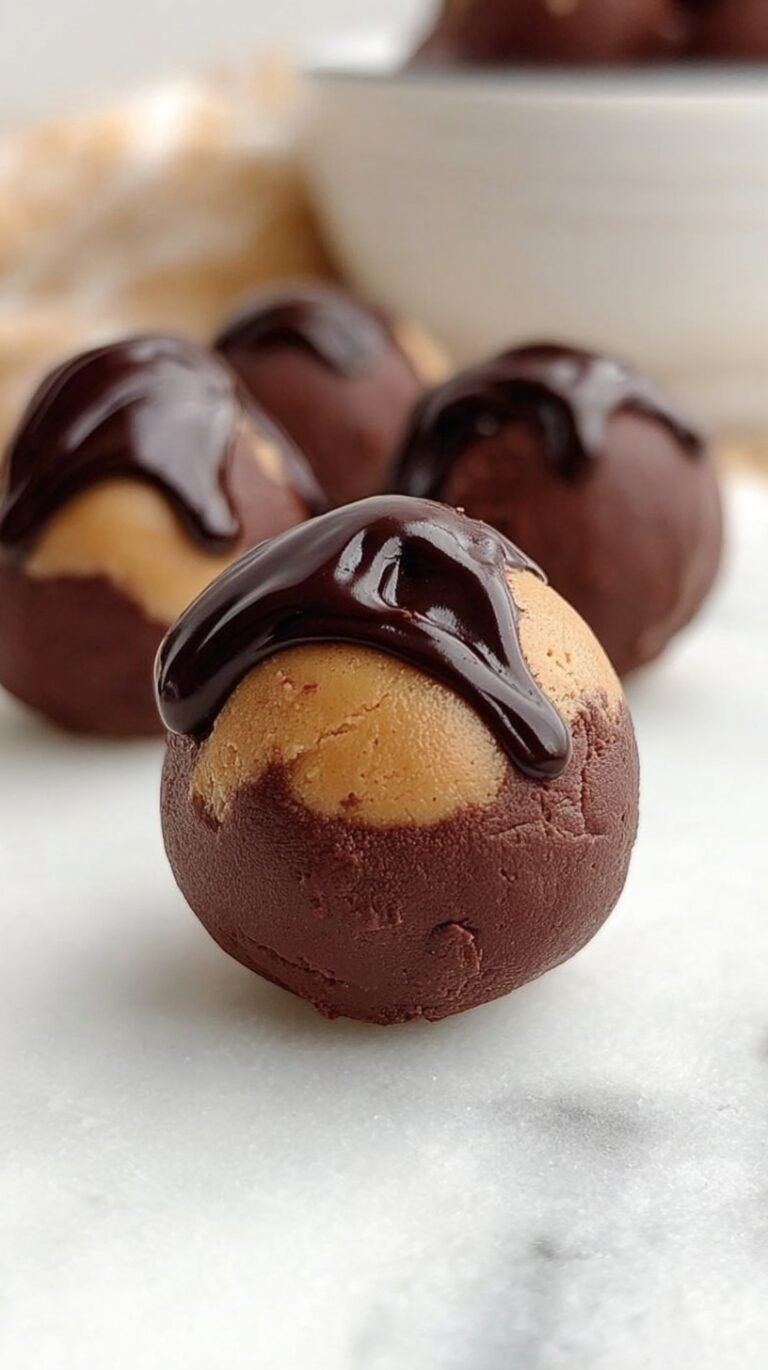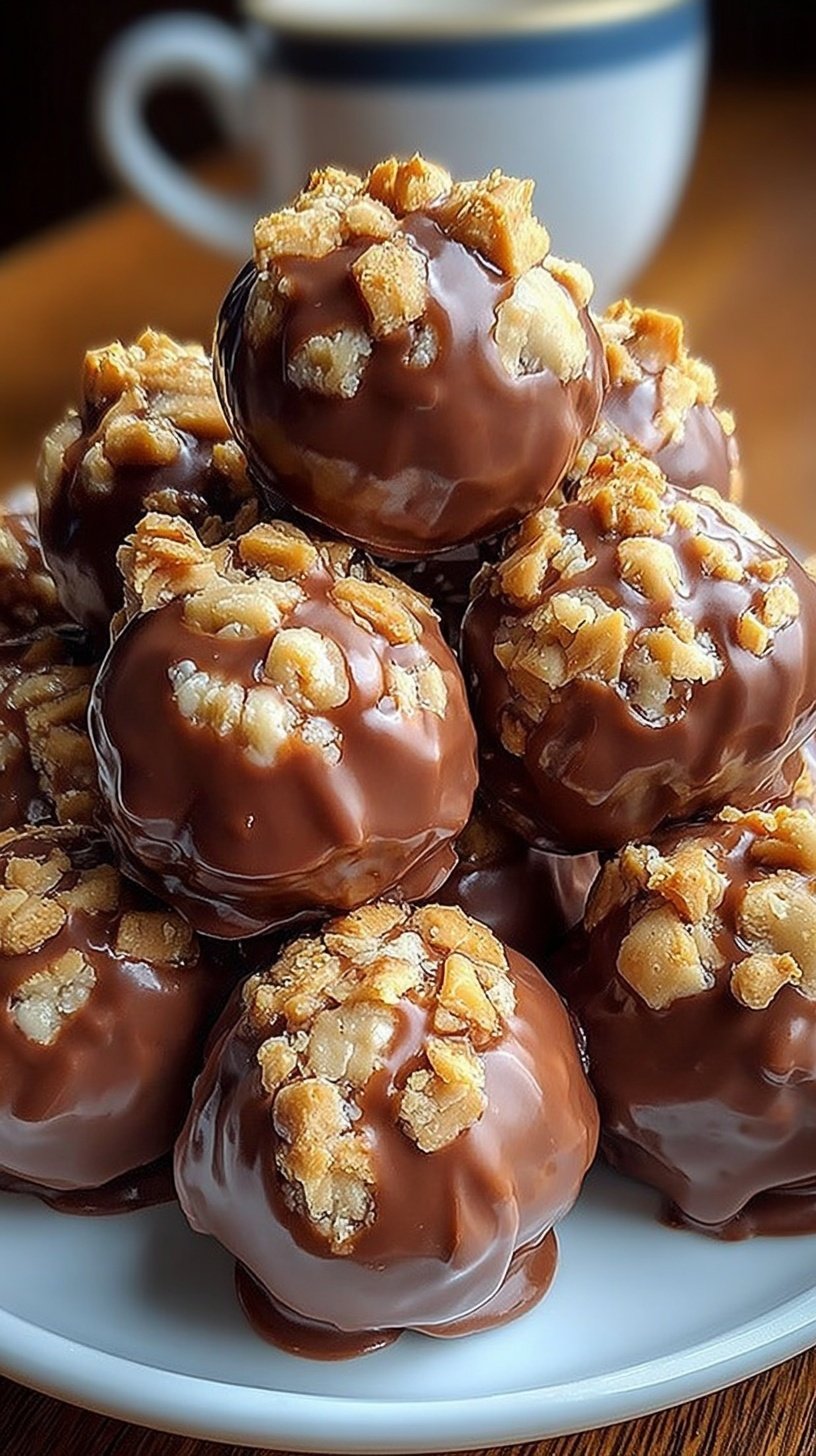
Sometimes you just need something sweet, crunchy, and chocolatey. These Butterfinger dessert balls are the perfect solution for your cravings. They are fast to make and even faster to disappear. You only need five simple ingredients to get started.
This recipe delivers a rich, peanut butter center with a crisp chocolate shell. It is a fantastic way to use up extra candy. Your family will love the creamy and crunchy texture in every bite. It is time to treat yourself to something special.
Why This Recipe Is a Winner
These Butterfinger dessert balls are perfect for busy fall days. You do not even have to turn on your oven. Kids love the familiar taste of their favorite candy bar. They are great for making ahead of time for a party. You will love how the creamy center meets the crunchy shell. This recipe is a guaranteed crowd-pleaser for any gathering.
Easy Cooking Steps
Making these is as simple as mixing and rolling. You just crush the candy and blend it with cream cheese. A quick chill in the fridge makes them easy to handle. Even if you are a beginner, you can do this easily. No fancy equipment is required for these tasty bites.
Simple Ingredients
You likely have most of these items in your pantry already. These pantry staples come together to create something amazing.
- 6 standard Butterfinger candy bars (approx 2.1 oz each), finely crushed
- 8 oz cream cheese, softened to room temperature
- 1/2 cup creamy peanut butter
- 1 cup semi-sweet chocolate chips
- 1 tablespoon coconut oil
Step-by-Step
- Crush Butterfinger bars into fine crumbs using a food processor or a rolling pin.
- In a stand mixer or large bowl, combine the softened cream cheese and peanut butter until homogeneous.
- Reserve 1/4 cup of candy crumbs; fold the remaining crumbs into the cream cheese mixture.
- Portion the mixture into 1-inch spheres (approximately 1 tablespoon each) and place on a parchment-lined tray.
- Chill the spheres in the refrigerator for 30 minutes.
- Melt chocolate chips and coconut oil in a double boiler or microwave-safe bowl until a smooth glaze forms.
- Using a dipping tool or fork, submerge each chilled ball into the melted chocolate.
- Place back on parchment and immediately garnish with reserved candy crumbs.
- Refrigerate for 15 minutes or until the chocolate coating is fully set.
Best Ways to Enjoy It
Serve these chilled on a pretty platter at your next gathering. They look beautiful next to a bowl of fresh fruit. You can also tuck them into lunchboxes for a special surprise. These are always the first things to go at a potluck. Pair them with a cold glass of milk for the best experience.
Keep It Fresh
Keep these in an airtight container in your refrigerator. They will stay fresh and delicious for up to one week. You can also freeze them for a longer-lasting treat. Just thaw them for a few minutes before you take a bite. Refrigeration keeps the chocolate shell crisp and the center creamy. This makes them a perfect make-ahead option for holidays.
Tips for Best Results
- Don’t skip the chilling step before dipping in chocolate.
- Avoid over-mixing the cream cheese so it stays firm.
- Use a cookie scoop for perfectly even dessert balls.
- Make these a day early to save time on party day.
- Add a sprinkle of sea salt for a gourmet touch.
- For Halloween, use festive sprinkles alongside the candy crumbs.
- Use a fork to tap off excess chocolate after dipping.
Ways to Switch It Up
- Swap semi-sweet chips for dark chocolate for a richer flavor.
- Use dairy-free cream cheese and chocolate for a vegan-friendly version.
- Try white chocolate coating for a bright, seasonal look.
- Add a pinch of cinnamon for a warm fall twist.
Quick Answers
Can I make these ahead?
Yes, you can make these several days in advance. They store perfectly in the refrigerator until you are ready to serve. This makes party planning much easier for you.
Do I need a food processor?
You do not need a food processor for this recipe. Simply place the candy in a bag and use a rolling pin. It is a great way to let kids help in the kitchen.
Will kids eat these?
Kids absolutely love these treats because they feature their favorite candy. The size is perfect for little hands to grab and enjoy. They are a hit at every school event.
I hope these sweet treats bring a smile to your face. They are so simple to whip up for any fall occasion. Give them a try and enjoy every crunchy bite.
— Alex

Ingredients
- 6 standard Butterfinger candy bars (approx 2.1 oz each), finely crushed
- 8 oz cream cheese, softened to room temperature
- 1/2 cup creamy peanut butter
- 1 cup semi -sweet chocolate chips
- 1 tablespoon coconut oil
Instructions
- Crush Butterfinger bars into fine crumbs using a food processor or a rolling pin.
- In a stand mixer or large bowl, combine the softened cream cheese and peanut butter until homogeneous.
- Reserve 1/4 cup of candy crumbs; fold the remaining crumbs into the cream cheese mixture.
- Portion the mixture into 1-inch spheres (approximately 1 tablespoon each) and place on a parchment-lined tray.
- Chill the spheres in the refrigerator for 30 minutes.
- Melt chocolate chips and coconut oil in a double boiler or microwave-safe bowl until a smooth glaze forms.
- Using a dipping tool or fork, submerge each chilled ball into the melted chocolate.
- Place back on parchment and immediately garnish with reserved candy crumbs.
- Refrigerate for 15 minutes or until the chocolate coating is fully set.